
Motovlogging can evolve from just a hobby to a professional career where a proper setup is necessary. While motovlogging needs several types of setups, preparing the helmet is the most important one. You need the best camera setup on your helmet to take the game to the next level.
To set up a motovlogging helmet, mount your camera from where you get the best view and feel comfortable. After that, connect your audio adaptor (if needed) to the camera and mount it as well on the helmet. Then, connect your microphone to the audio adaptor and place it preferably inside your helmet.
That said, you should know that there are other things you must know about your motovlogging helmet before venturing into it. Don’t worry, because in this article, we have provided all the information you need to set up your motovlogging helmet on the go.
Let’s get you set up and ready to go!
What Do I Need To set up A Motovlogging Helmet?
To set up a motovlogging helmet, you need your helmet chin mouth strap, external microphone, microphone adaptor casing, helmet camera, etc. However, before we head into that in details helmet, let’s look at what motovlogging entails.
What is a Motovlog?
Motovlogging is a type of vlog (video log) whereby a motorcycle rider records his/her riding experience. The term ‘vlog’ is a portmanteau and neologism that emanates from the words ‘video’, ‘log’. While some motovloggers host training sessions, others show/tell some things about motorbikes, engines, torque, RPM, or bike engines, etc.
Besides, they share their way to a set destination asd log the whole ride through the lenses.
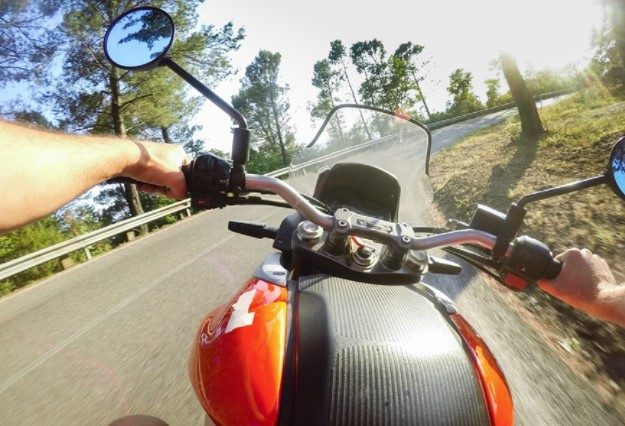
Motorvloggers usually mount their cameras at unique positions—at their chest, the chin, or by the side of the helmet. Alternatively, most motovloggers prefer to use multiple views for a cinematic sequence, but that’s a thing for the pros, and we’re only focusing on helmet mounts today.
What are the Factors to consider when setting up your motovlogging helmet?
Basically, setting up your motovlogging helmet depends on a few things as such:
Your Budget
Setting up an entire motovlogging career doesn’t cost much. However, while cost is not a major thing in your entrant into motovlogging, high-quality motovlogging components can be expensive for a newbie. That said, you need to know how much you’re able to spend to get all the required components, as there are various components.
Your Desired Camera Video Resolution
Your camera is one of the most (if not the most) important components in your array of equipment for motovlogging. This is because a good camera can transform your audience’s view of the entire riding process with just the right video clarity. However, a cheap quality camera can wreck your entire motovlogging career. Why is this so?
Camera resolution! High-quality cameras produce the best resolutions for both yourself and your audience. Whereas, a poor-quality camera will cause a headache for you and bore your audience, and that’s the last thing you want.
Now that we have successfully established the foundations for setting up a motovlogging, what do you need to set up a motovlogging helmet?
What Do I need to Setup My Motovlogging Helmet?
1. Helmet (A good one)
The helmet is the pivotal component in not just motovlogging, but motorcycle riding in general. That’s because safety is the highest priority when riding a motorbike. Also, research shows that the majority of motorcycle injuries are head-related and thus, wearing a helmet reduces over 64% of injuries. So said, the helmet is the number one feature on our list of components today.
On the other hand, helmet selection isn’t only about getting any helmet you can purchase from a store but picking a secure one. In addition, the kind of helmet you need to select depends on your riding style (whether off-track). Whichever the case, ensure to get the right helmet for motovlogging, as your safety is also a priority and should be treated as such.
2. Helmet Ring
The helmet ring is used to keep your helmet in place while you’re working on it. While integrating your external components on the helmet, you need a helmet ring to make sure your helmet doesn’t roll away.
3. Selection of Bits and Bolts from the Camera
This tiny piece of equipment helps you fasten the camera holder. They may look little, but their usefulness can’t be understated.
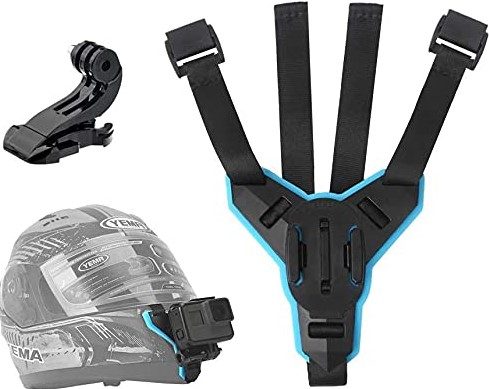
4. Helmet Chin Mount Strap
The Chin mount strap is used for mounting your camera right in front of your chin. This gives one of the ideal front views for motovlogging while positioning the camera at the forefront of your face.
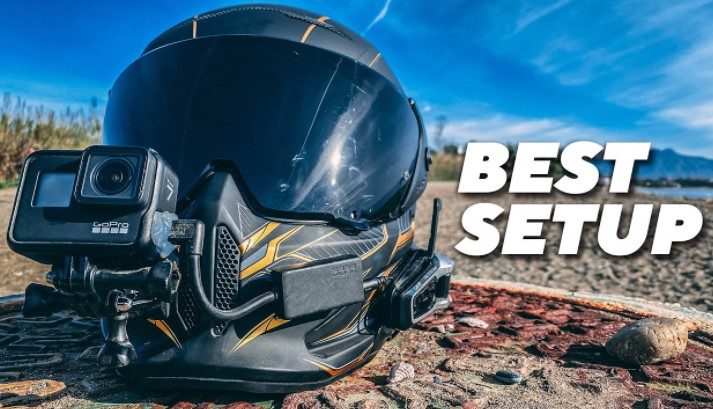
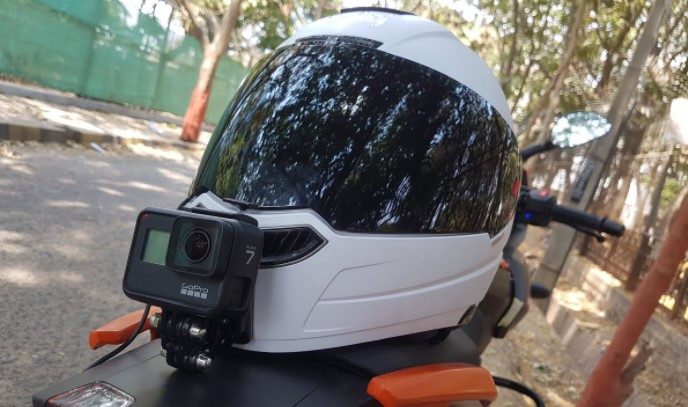
5. Helmet Camera
Helmet cameras are a specific kind of camera designed for capturing and recording video logs while riding. These cameras are called ‘action cameras,’ and are very portable. This makes the action camera easy to attach anywhere around you while riding at high speed.
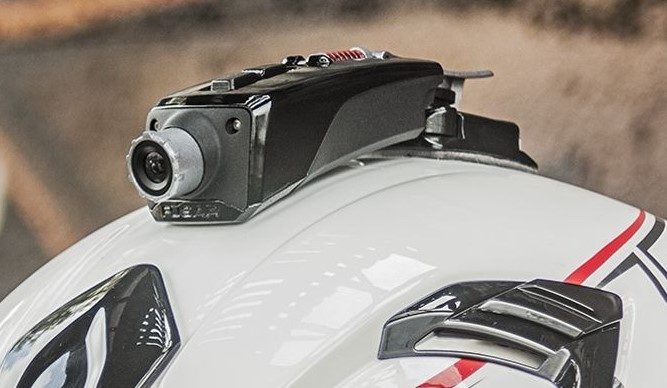
The originator of the idea of action cameras is GoPro, and up to date, they are among the best action camera manufacturers. Nevertheless, for the best quality pictures, then go for portable and lightweight action cameras that can produce 4k resolution pictures and videos.
Also, since we are prioritizing budget, you should go for an effective action camera that is within your budget but versatile in functionalities.
6. External Microphone
As a motovlogger, a great video isn’t all that you need. A great quality video with a wrecking noise in the background is a total disaster for motovlogging. All cameras come with an onboard microphone, but while riding, it’ll be a wrong decision to use that. Therefore, you need to put in your budget an external microphone to record your voice while balancing the sound of your motorbike.
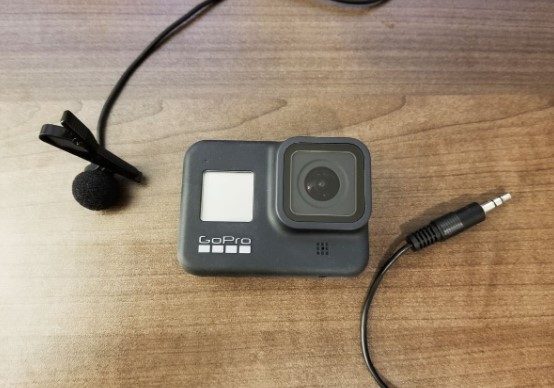
For the best audio quality, an Apple AirPods is recommended. However, if that is above your budget, then go for any suitable external microphone. Preferably, lapel microphones which you can position close to your mouth. The microphone will be clearest when inside your helmet, as the external noise will be the least inside your helmet.
In addition, external microphones are usually very affordable but can be expensive depending on the brand and functionality. There are two kinds of microphone jacks:
7. The TRS
This means Tips, Rings, and Sleeve and is very easy to identify because of its two separate rings. Most lavalier microphones are TRS kinds. You can record clear audio with videos just fine.
8. The TRRS
The TRRS means Tips, Rings, Rings, and Sleeve, and the rings are very visible. It’s popularly found in smartphones and computers. Now, if your camera has a TRS port and you have a TRRS microphone, you will need the TRRS-to-TRS connector to connect both.
9. External Mic Connector/Adapter
This device is used as an alternative to connect a TRRS microphone jack to a camera with a TRS audio port. If your external microphone jack is compatible with your camera jack, then you don’t need the microphone adaptor.
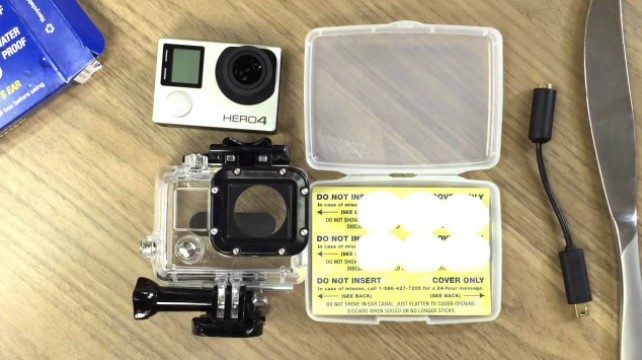
10. External Case for Mic Adaptor and Camera
This case is much bigger than the camera and is unique to the kind of camera you purchase. In addition, the case helps you protect your external camera and mic adaptor. So, just in case it falls off while riding, you won’t need to worry much about fatal damage to the camera.
How Do I Setup My Motovlogging Helmet?
If you’re wondering how do I set up my motovlogging helmet, do the following things below:
Place your helmet on the helmet ring
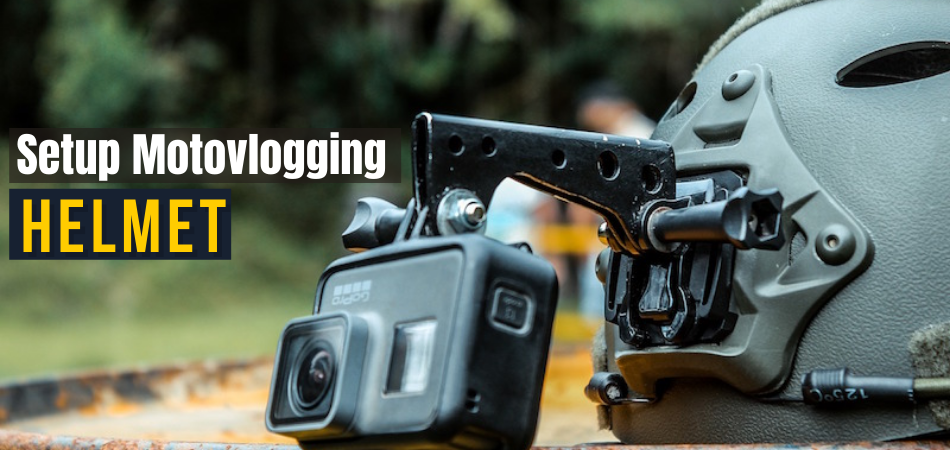
You can mount your camera on your chin, above your head, besides your head, or on your chest. When coupling your camera, ensure that the bolts are installed in positions that won’t obstruct your vision or give you a hard time accessing them. Also, your camera shouldn’t be too far out or too high.
When you’ve found an ideal position for your camera mount, then press it hard on the helmet and ensure that it has stuck hard. However, if the helmet’s face is angular, you may need to install a plastic weld material.
Now insert your action camera into the camera holder and do it properly.
If you’re using a mic adaptor, connect the adaptor jack to the camera as it’s mounted on the helmet. The other end of the adaptor should also be attached to the helmet.
After that, mount your microphone on your helmet. You can place the mount at the back of your helmet to minimize air resistance. Also, you can place it by the side of the helmet. Once you have successfully done that, connect your microphone to the adaptor directly or to the TRRS-to-TRS adaptor.
When you have successfully installed all these components, test the helmet for a perfect fit if it fits.
Final Thoughts
Motovlogging comprises motorcycle riders mounting a camera on their helmets or their bikes and recording the riding process. So, if you’ve been wondering how do I set up my motovlogging helmet, follow the process above. Ensure to get the necessary components needed for making an entire motovlogging helmet setup complete.
These components include a secured helmet, a helmet ring, an action camera, an action camera casing, an external microphone. Also, if your camera is a TRS variation, and you have a TRRS camera, then get the TRRS-to-TRS audio adaptor. The setup process of a motovlogging helmet is not so complicated, but you need to know how to set it upright to prevent mistakes.